First of all, thank you for purchasing my Lightroom Presets Pack. You now have a set of powerful and easy-to-use editing tools to create breathtaking images and make your photos limitless. In this post I’m going to show you how to import your presets into Lightroom and use them inside of Photoshop. Let’s get into it!
Installing presets in Lightroom classic (version 7.3 or later)
The instructions are for the latest versions of Adobe Lightroom Classic, released since mid-2018 and using the XMP preset format. You need to have version 7.5 or later. After you purchased your desired presets pack you will receive an email with a direct link to your product. Now, follow the steps below:
1. Using your computer, click the download button on the Preset Pack web page.
2. Locate the Preset Pack ZIP file in your Downloads folder.
3. Unzip the Preset Pack ZIP file.
Windows: Right-click the ZIP file, and select Extract All…. Choose where you want the preset folder to be created and click the Extract button.
Mac: Double-click on the ZIP file. A new folder will automatically be created with the XMP files inside.
4. Now that the presets are unzipped, they’re ready to be imported into Lightroom Classic! We recommend using the latest version of Lightroom Classic. You can download and install the most recent version through the Adobe Creative Cloud application.
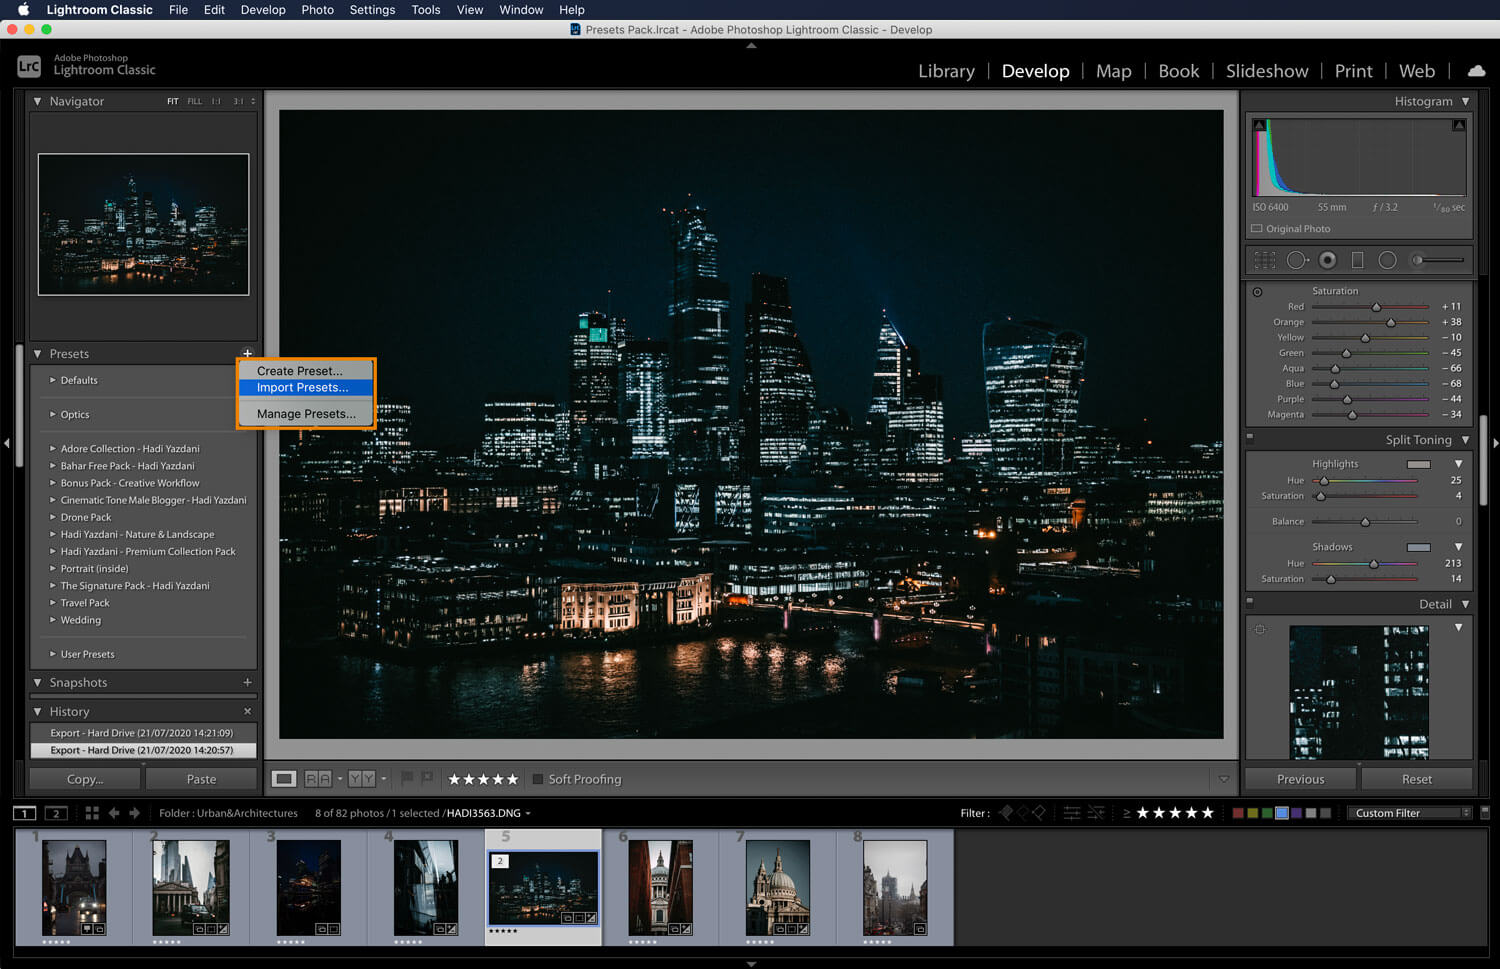
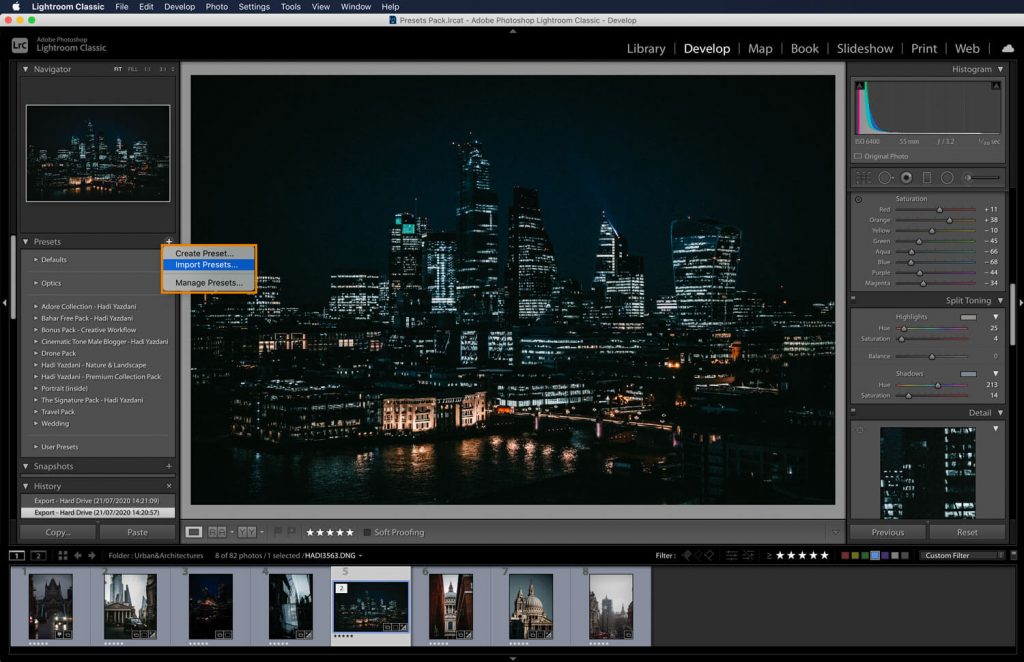
5. Open Lightroom Classic, select an image that you want to apply a preset to, and then open the Develop Module by clicking the Develop button near the top right of the screen. In the left panel, there is a drop-down bar labeled Presets. Click on the + icon in the Presets bar, and then select Import Presets.
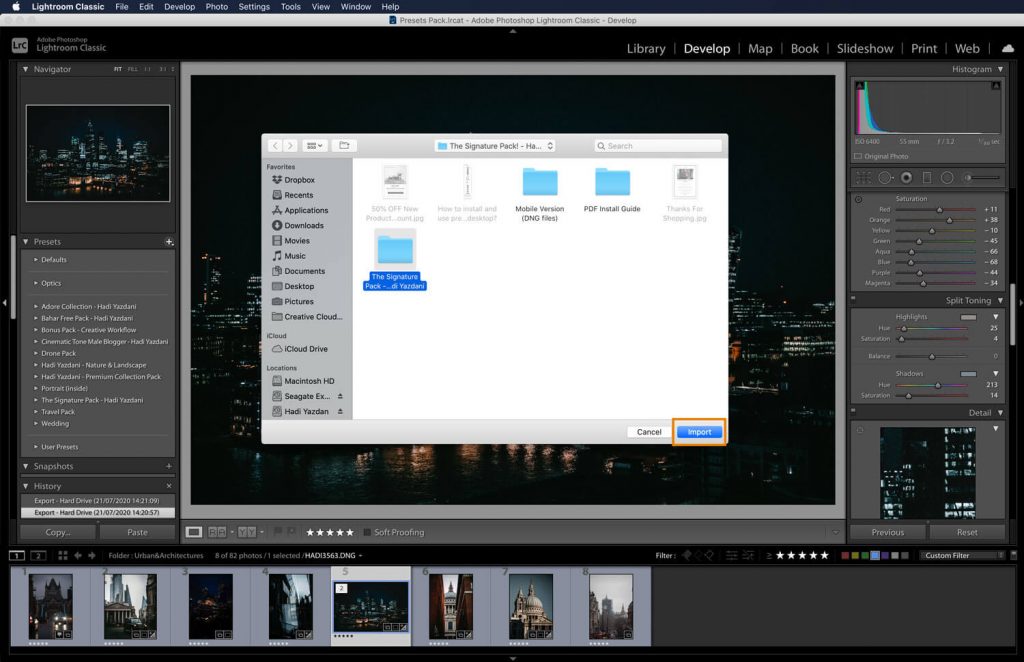
6. You can now navigate to locate where the downloaded presets ZIP file is located. Select Import.
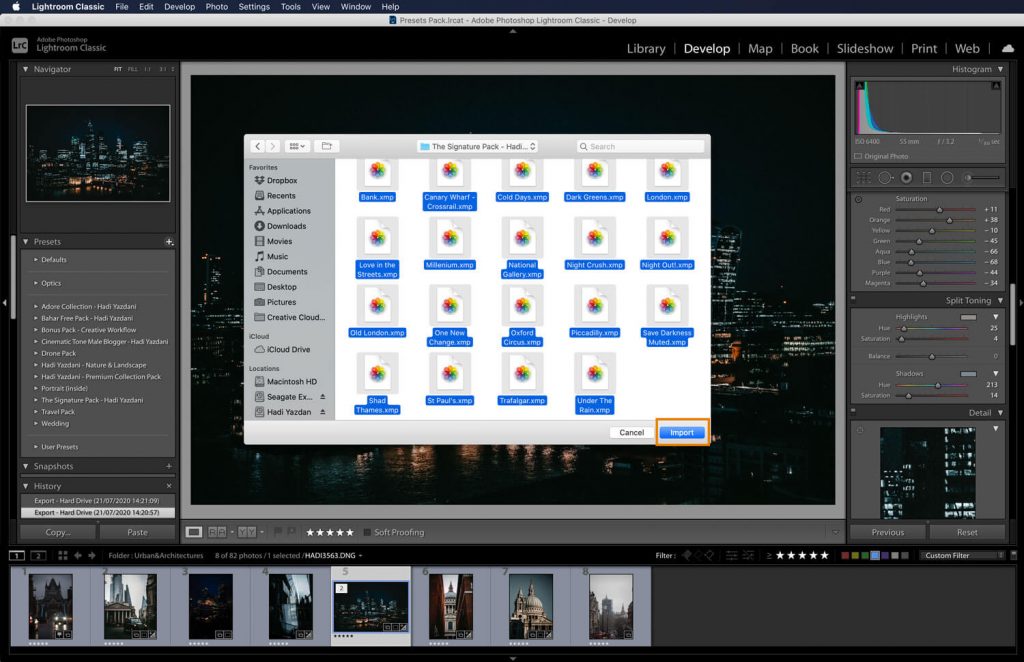
7. Each XMP file is a different preset. Select all XMP files, and then click on Import.
8. Click on the Arrow icon in the Presets drop-down bar. This will expand the menu and show you all of the presets that you have available. You should see an option with the name of the Preset Pack you just imported (i.e. Hadi Yazdani – Signature Pack). Click on the Arrow icon next to the new preset pack to reveal all of the presets within that pack, simply click on any preset to apply it to an image. Congrats!
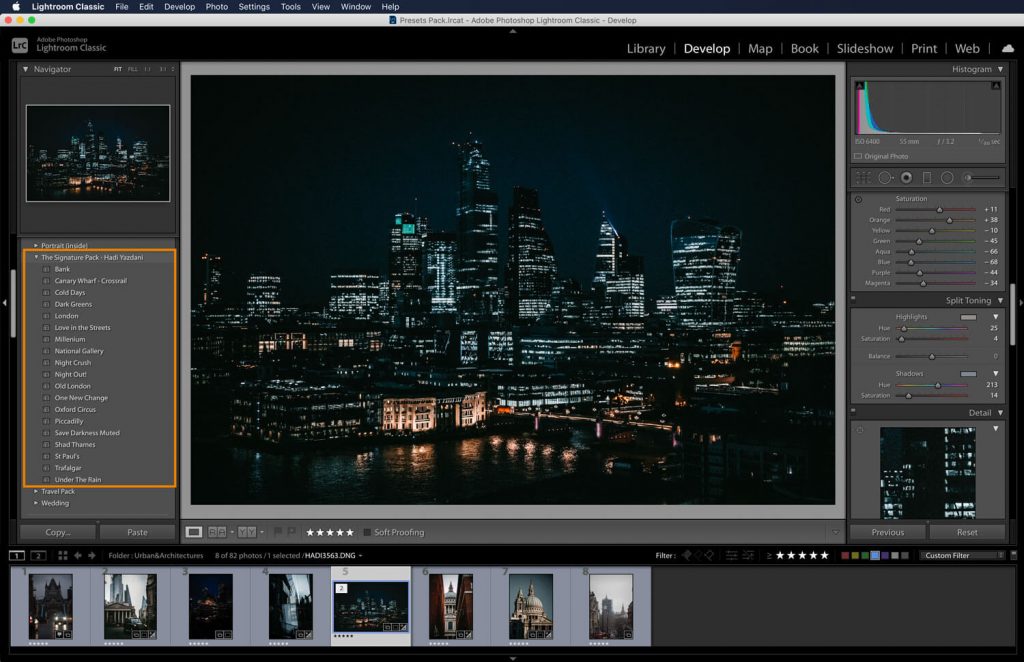
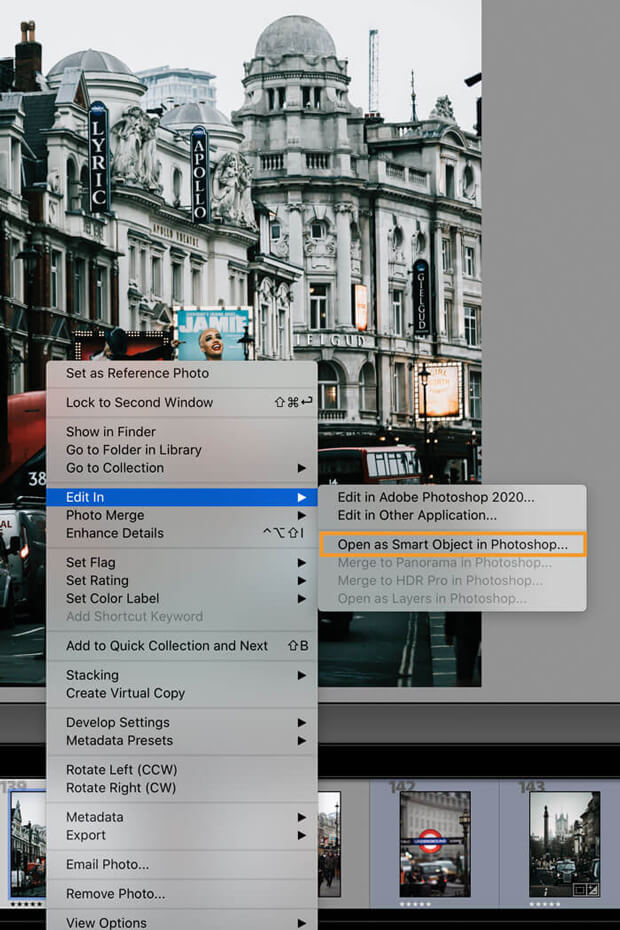
Now you have all the presets imported into Lightroom. It’s time to import them into Photoshop! To do this Right click on an image that you want to edit or apply presets and choose ‘Edit In>Open as Smart Object In Photoshop’. This will bring all of the adjustments you made and hold them in the smart object.
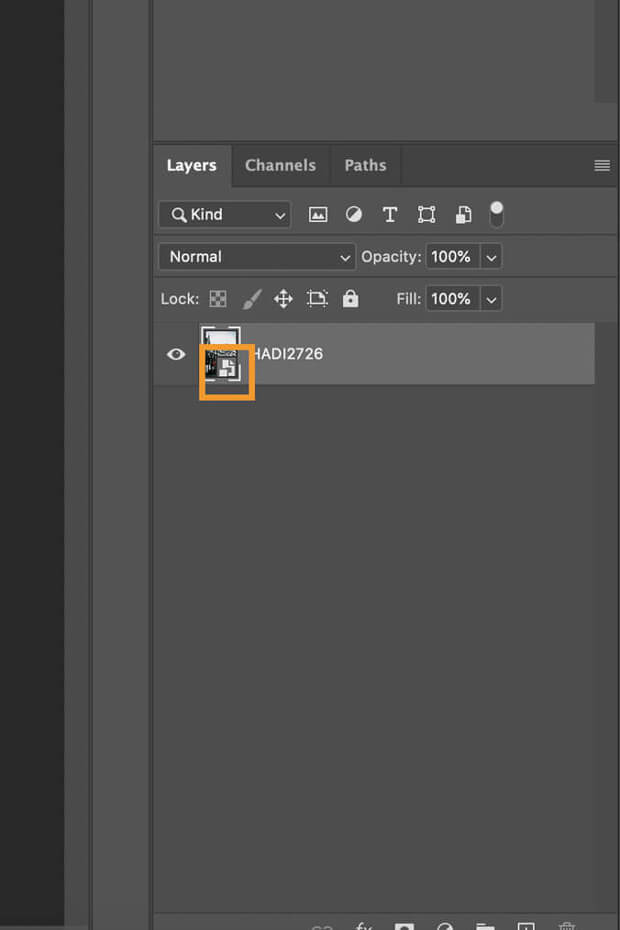
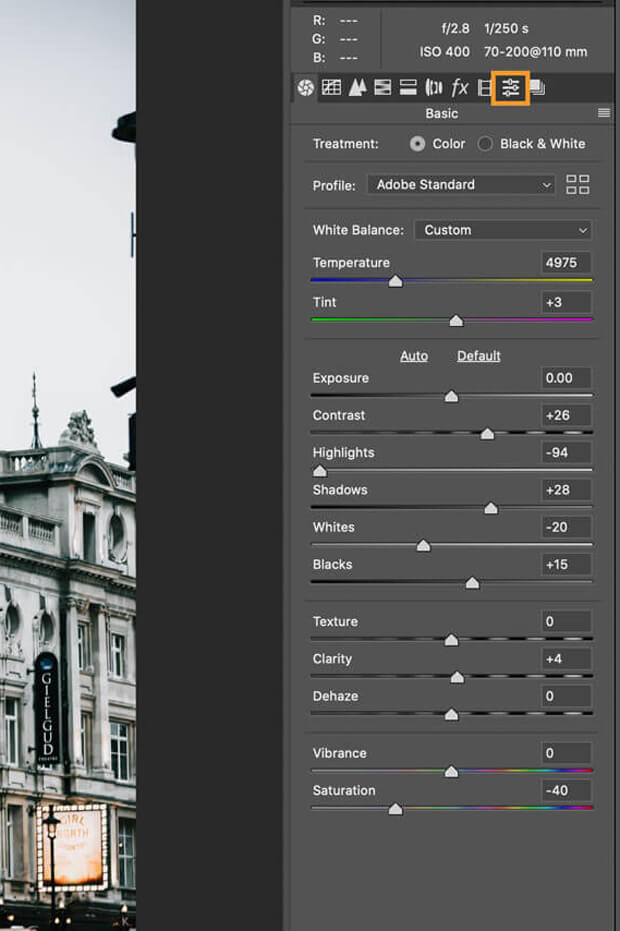
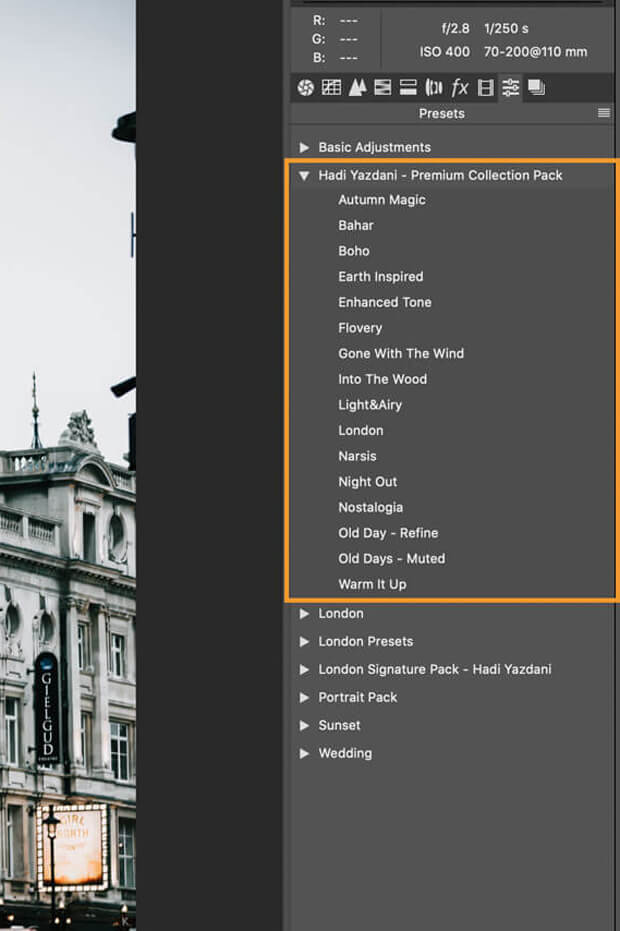
With your new file in Photoshop, double click on the smart object in the layers panel and the image will open in Camera Raw. From here you can click the ‘Presets’ tab and save these settings as a new preset.
You can also get access to Adobe Camera Raw inside Photoshop, select Filter from tab menu and then Camera Raw Filter.
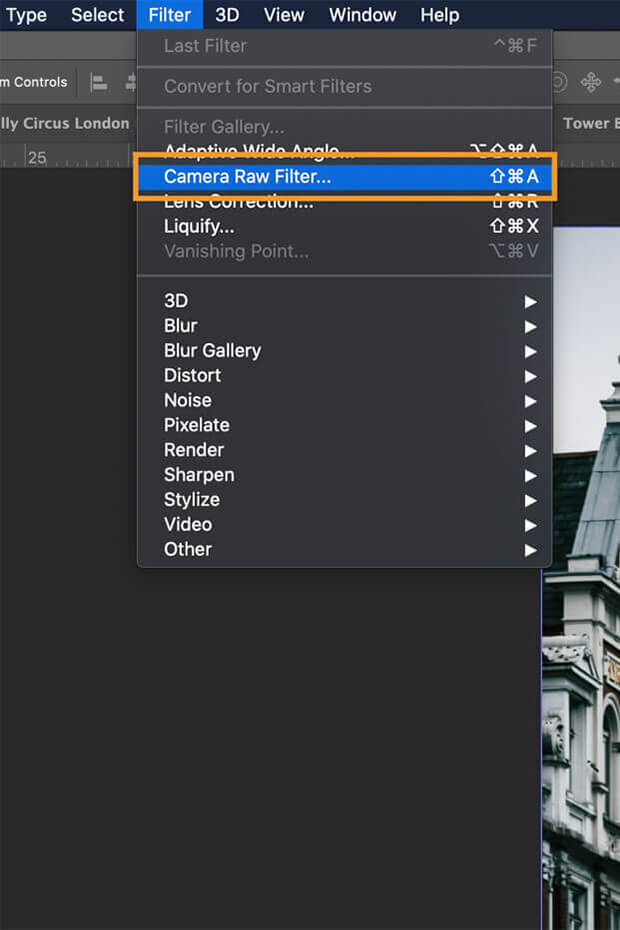
Now, you can open any image you like inside of Camera Raw/Photoshop and apply the preset you created. You can also further adjust the settings and fine-tune your image. My Lightroom presets are ready to buy and you can start exploring.
Editing photos and getting beautiful results is so inspiring. I’d love to see your work, feel free to tag me on instagram here @hadyyazdani or #hadiyazdani, can’t wait to see your work!
+ view the comments
